This guide is only here to show you how I go about my installations. Due to the number of console variations, the photos may vary from your console, but theoretically nothing should be blocking.
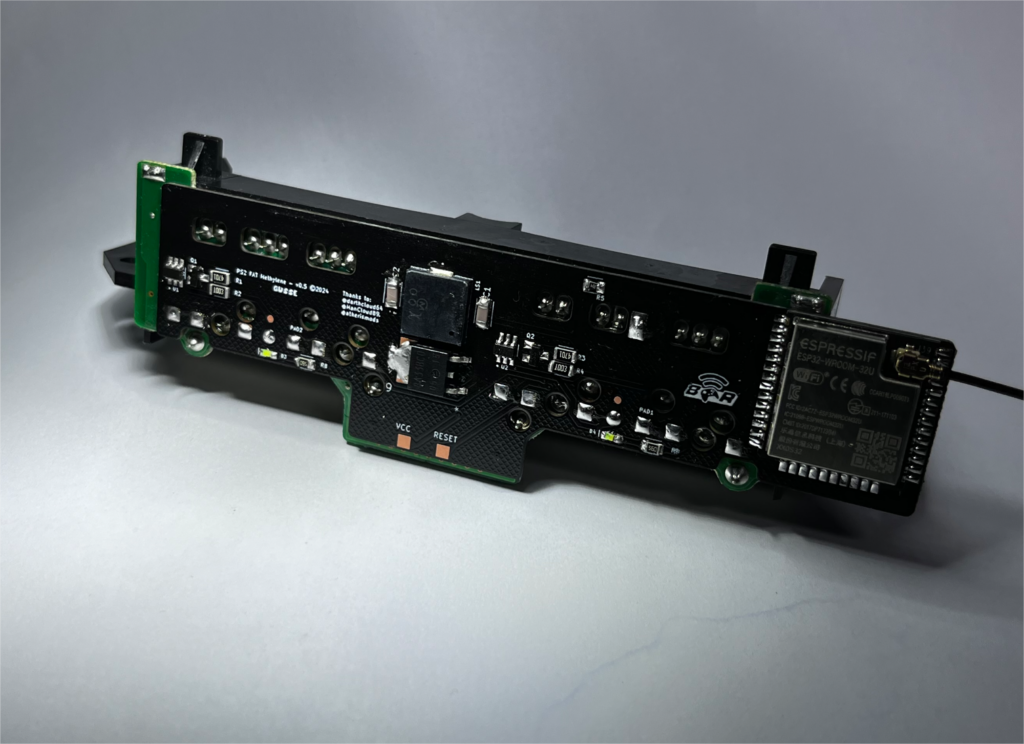
This guide will help you install PS2 FAT Methylene – Standalone (version with ESP32).
For basic versions (without ESP32), a flash guide will be available shortly, and soldering process of the ESP32 on Methylene is a straightforward soldering pad.
In this guide, I’ll assume that you have your PS2 Fat dissassemble controller board in your hands, as you’ll find some excellent disassembly guides on the Internet.
The guide may seem long, but installation is relatively quick (about 15 minutes).
IMPORTANT NOTE: this is the first revision of Methylene for FAT, I had only the PCBs manufactured to reduce costs in the event of a major defect. The boards are assembled manually by me. The design may be improved in future versions.
Before start installation, I recommend that you first read this guide in its entirety, then follow it step by step during the installation.
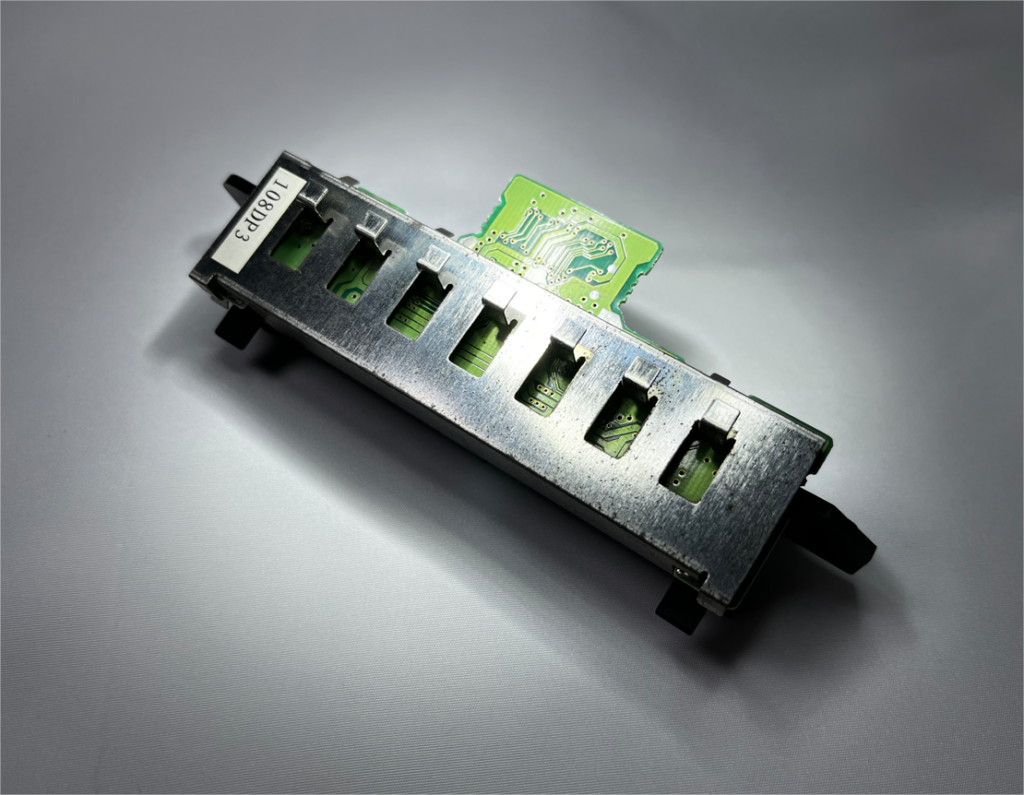
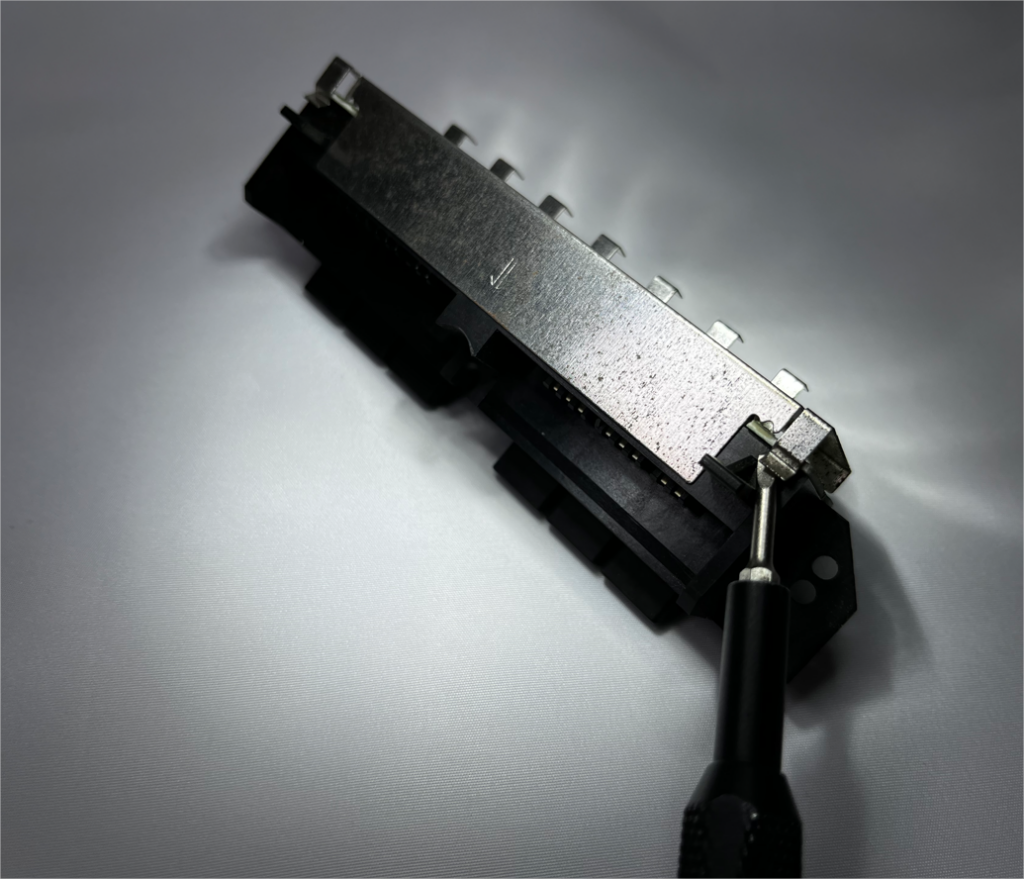
1. Removing the rear metal plate
use a flathead screwdriver as shown in the adjacent photo.
Depending on the revision, the backplate can be removed more or less easily, and you may need to press on the other side of the backplate to extract it. Take your time and be careful not to cut yourself on the metal.
2. Preparation for wired controller detection
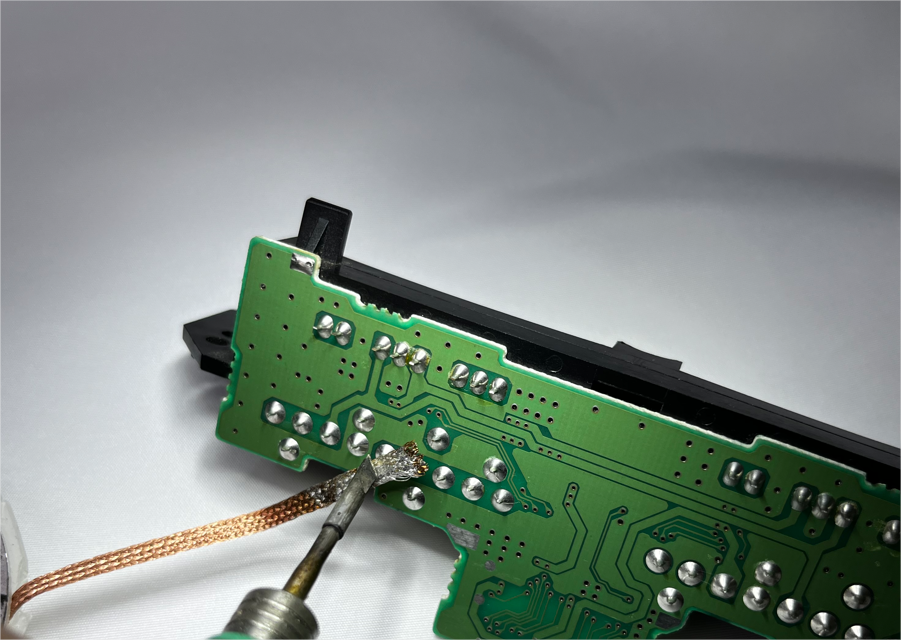
We start with the most technical part of the installation. This involves electrically isolating 2 pins of the controller connectors from the motherboard.
It consists in removing the solder from PIN N°5 of the 2 controller ports.
The aim of this operation is to break the contact of this connection, so that the port’s power is routed through Methylene and no longer through the console.
There are several ways to do this, depending on your equipment:
- use desoldering braid and your soldering iron
- use a desoldering pump
- use a desoldering gun (the best solution in my opinion, but the most expensive if you don’t have the equipment)
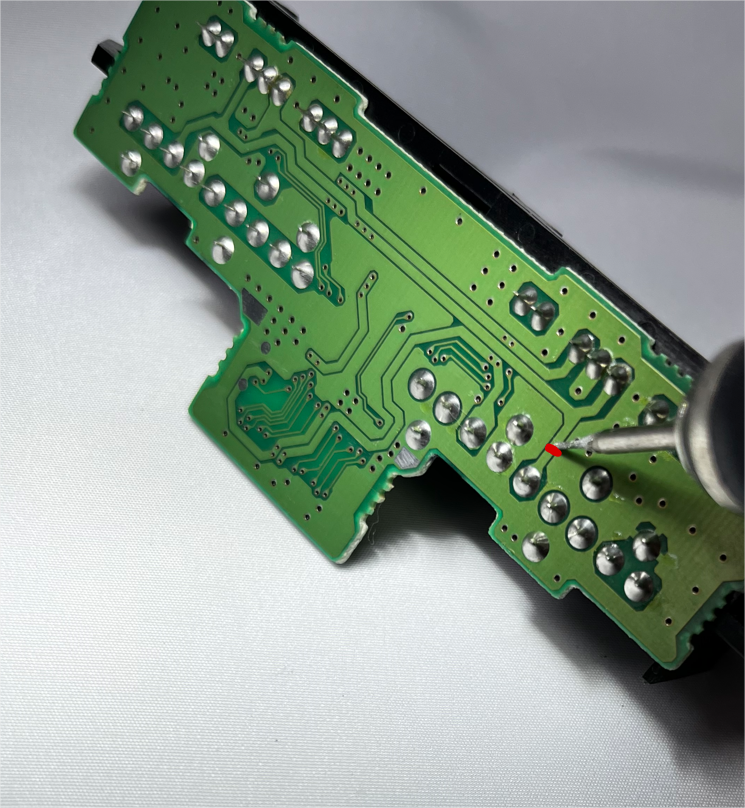
- For port 1 you can cut the trace indicated with blade or milling cutter.
Once the desoldering operation has been completed, check the continuity between the motherboard and the pin. Normally, there should be no contact, but if not, repeat the operation until there is no contact.
Optional/recommended: Once this is done, you can add UV paste or glue to hold the pin 5 in position and avoid false contacts
3. For Methylene BASIC versions only
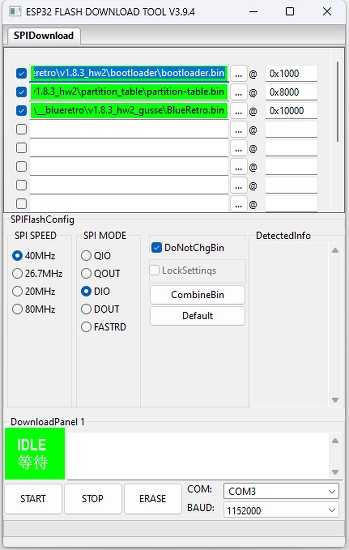
Flash the ESP32 using your external programmer, or use an ESP32 already flashed with blueretro, and you’ll be able to update it by OTA update via bluetooth.
You’ll find an excellent tutorial on this on Blueretro’s Github repo at this address:
https://github.com/darthcloud/BlueRetro/wiki/Flashing-firmware-Windows-10
A link to get Blueretro (bootloader.bin and partition-table.bin):
https://darthcloud.itch.io/blueretro (please make a donation to the team behind this great work)
Please check download page to find the latest modified version of Blueretro for Methylene
Downloads page
Once your ESP32 is flashed, all you have to do is solder it to the corresponding pad on the board.
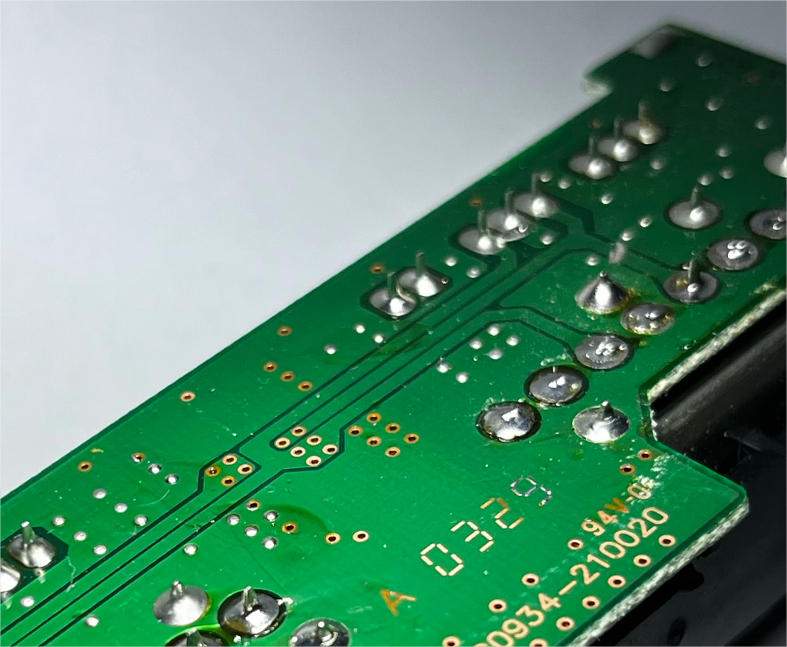
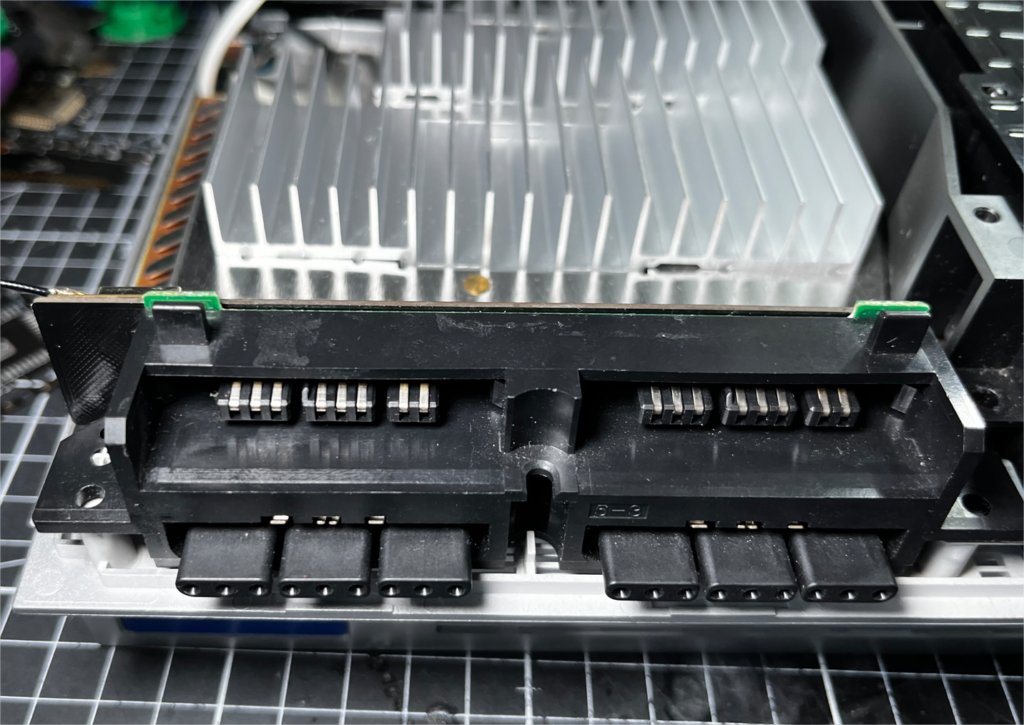
4. Solder board to controller port pins
Check the alignment of Methylene with the connection pins. If you see that the board is bending a little too much because of the soldering tips on the memory card port, you can cut them off with a wire cutter, or remove solder, then redo solder with a small amount of solder.
When the flex is aligned, tack the first solder point to align, then another at the end, and then solder all the points.
Beware of the specific connection detection point: although it’s isolated behind the board, it’s advisable not to overload it with solder to avoid coming into contact with the motherboard, and to be in good contact with the pin that comes out.
TIP: you can stick on a piece of kapton tape, and pierce it with the detection pin to solder without worrying too much about a possible connection problem.
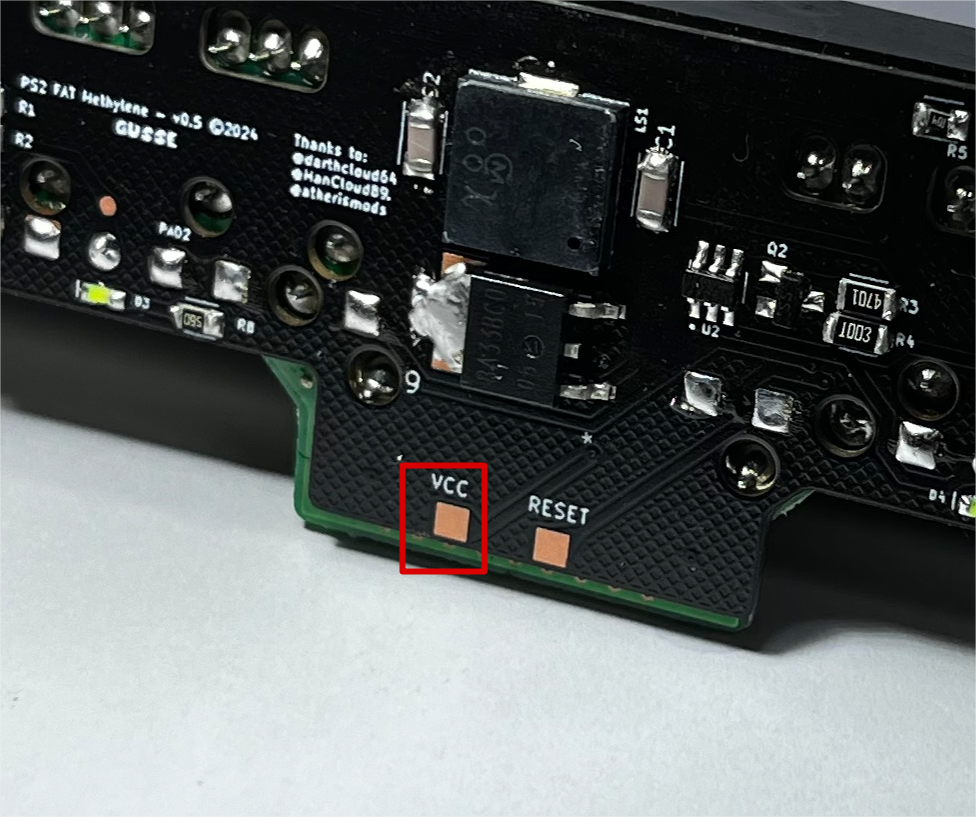
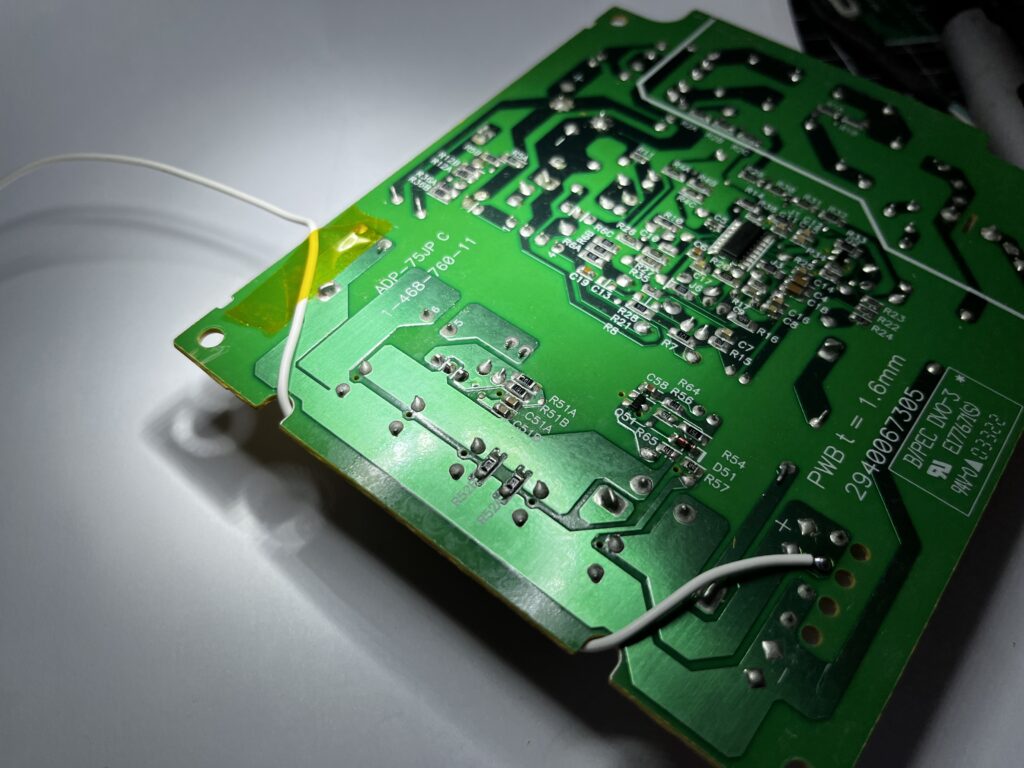
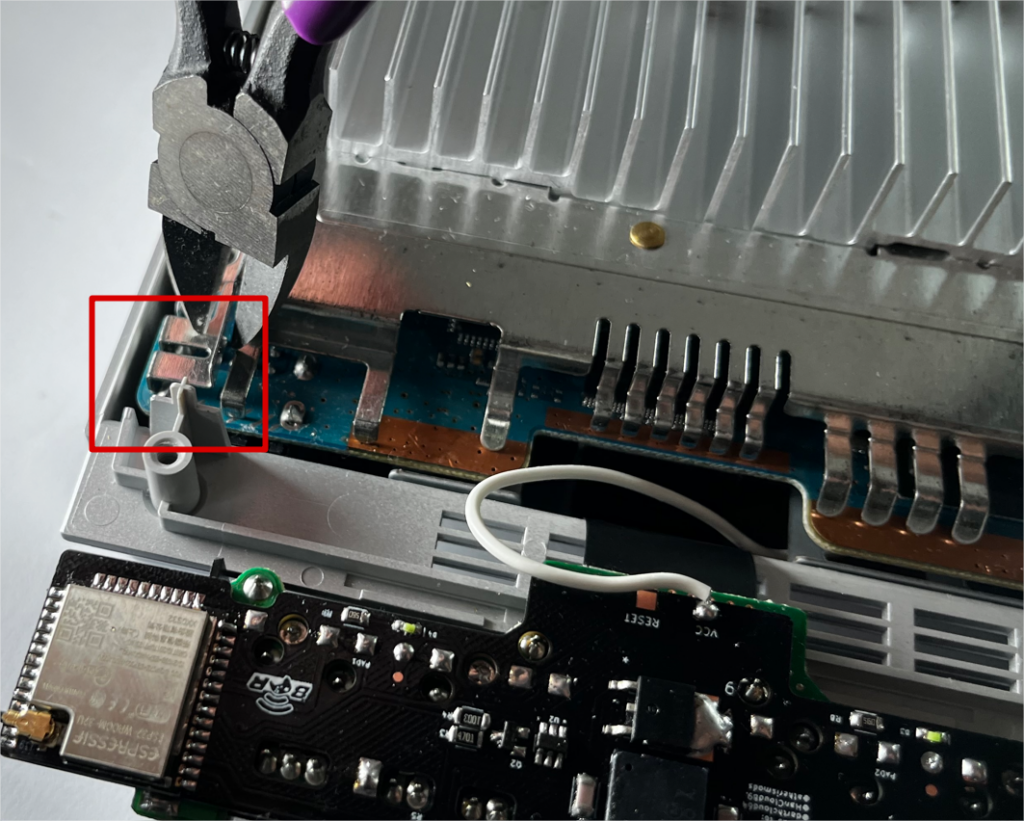
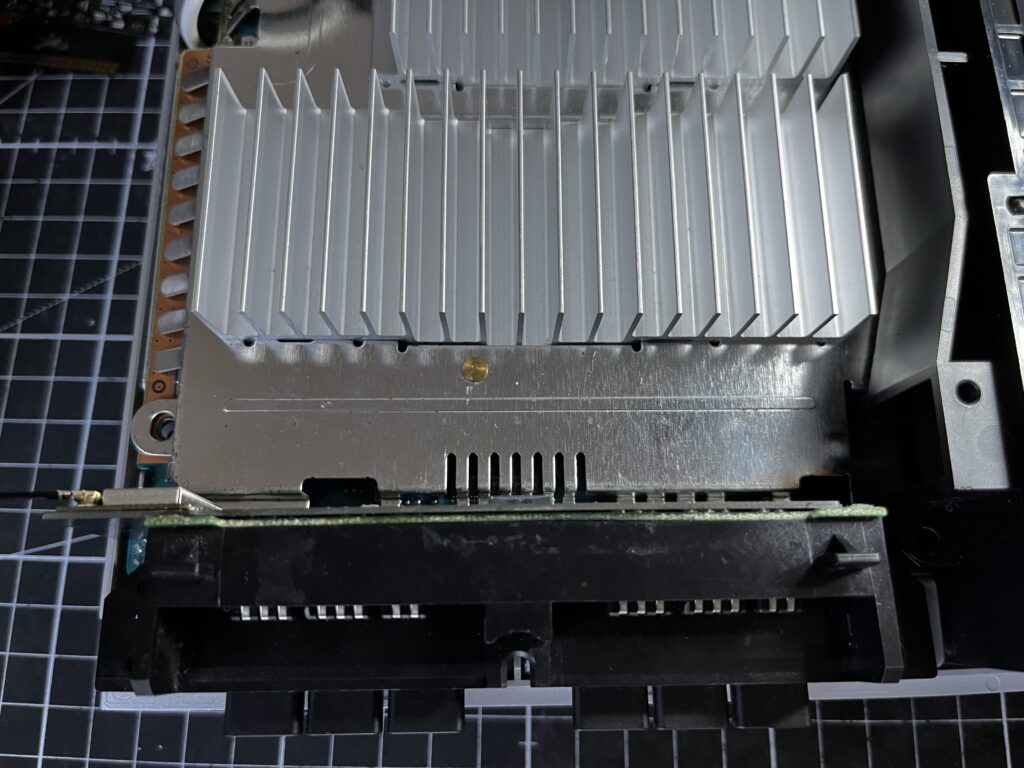
5. Soldering the power supply wire
Solder a wire from your console’s power supply to the PAD named VCC on Methylene.
I recommend using at least AWG26 wire.
rePS2 modded console
For consoles with the rePS2 mod, here’s the soldering point to use to VCC on Methylene; for others, see below.
(Thanks to AtherisMods for the photo)
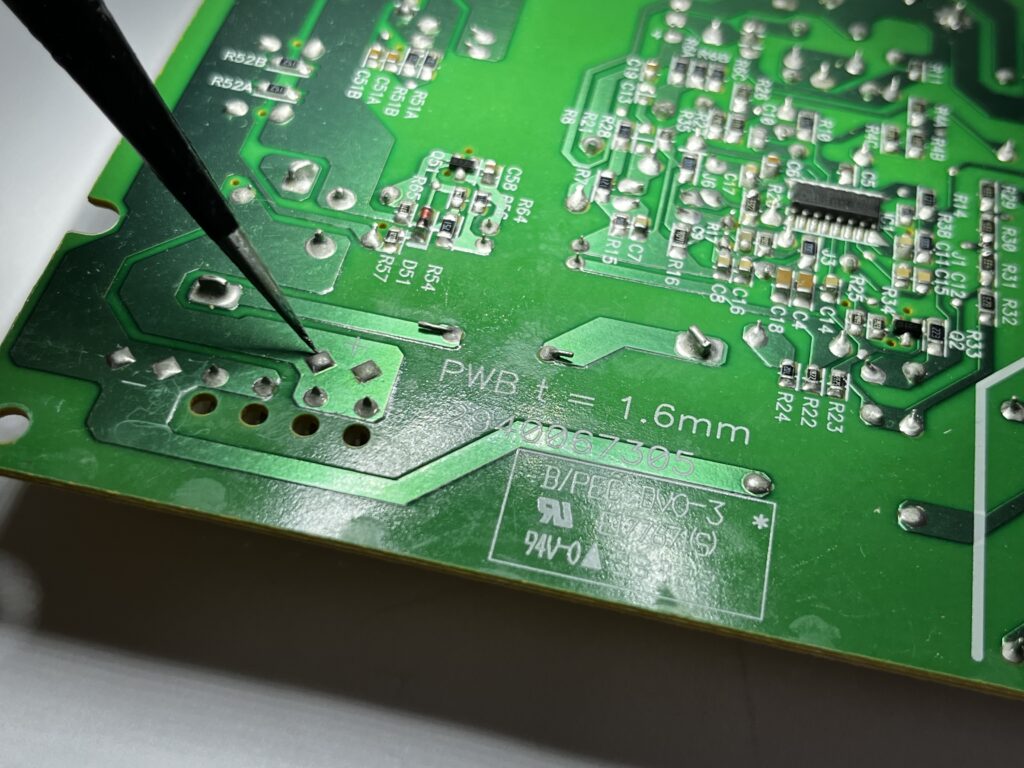
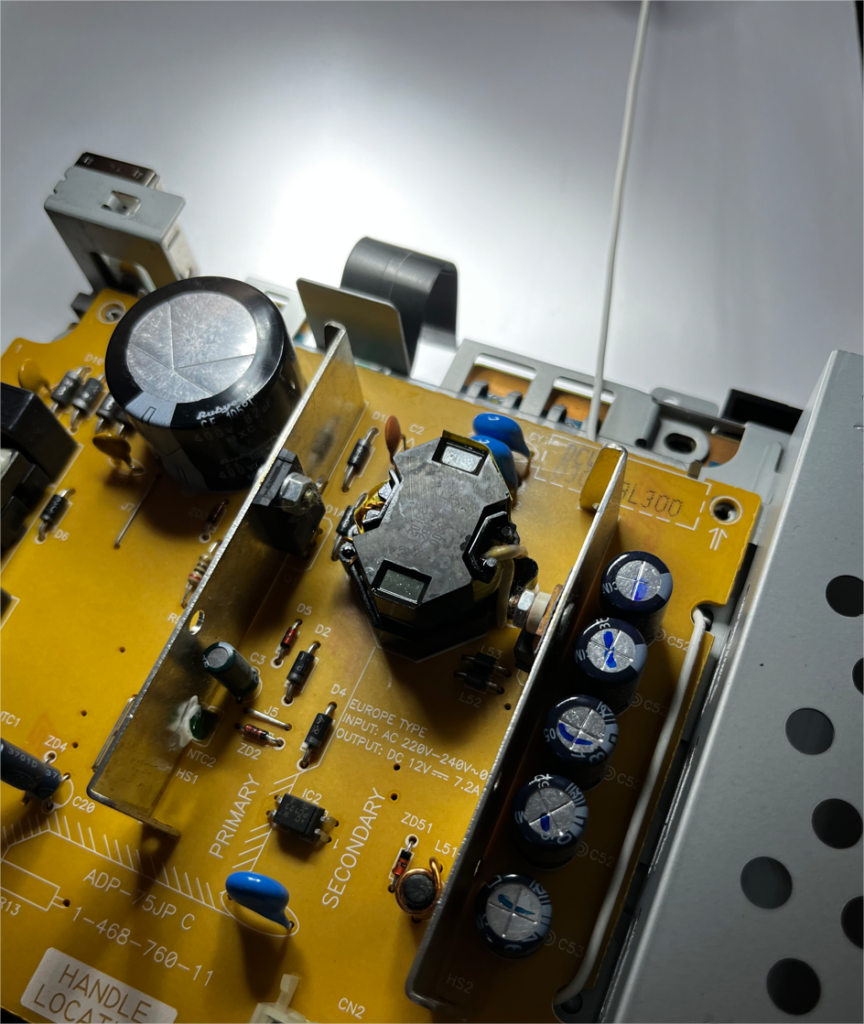
For standard PS2 Fat power supply
To avoid completely dismantling the PS2 Fat, I recommend soldering on the 12v power supply.
You’ll generally find it on the console’s 4 connection pins. 2 pins correspond to VCC, and the other 2 pins correspond to GND.
If in doubt, use your ohmmeter between a large metal part. If you have continuity, it’s GND; if you don’t have continuity, it’s VCC, and therefore the point you want to use.
IMPORTANT : be careful not to pinch the wire when reassembling the console.
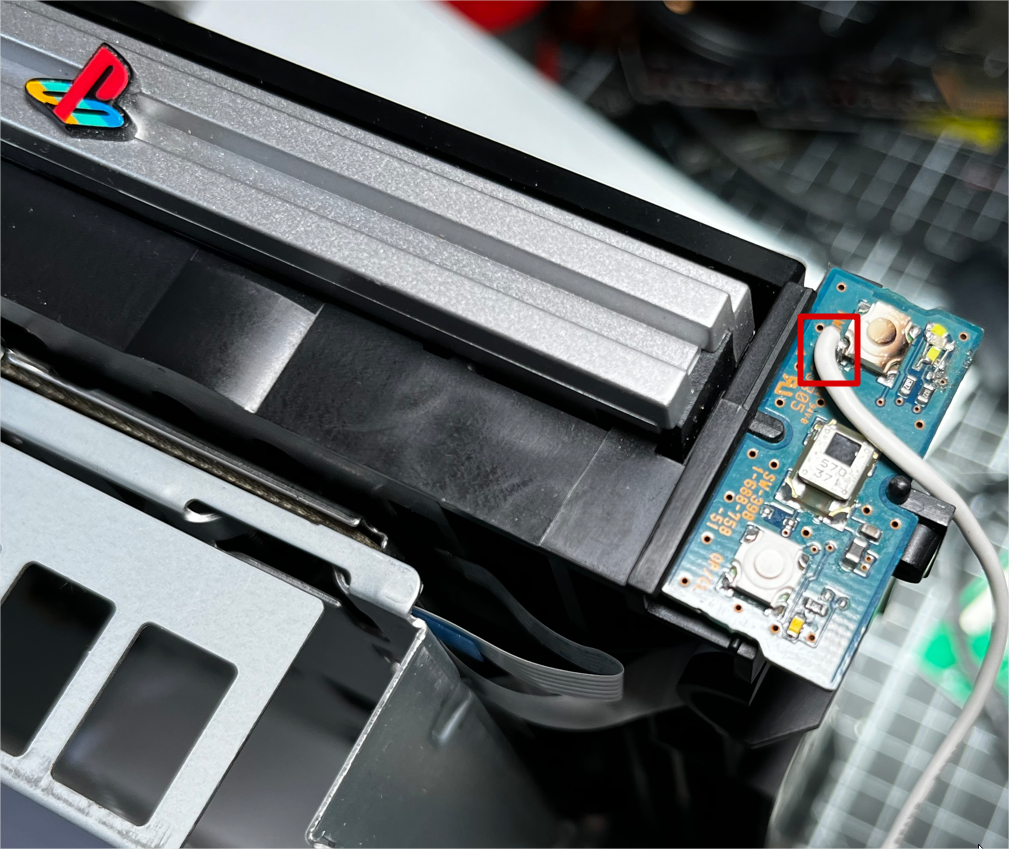

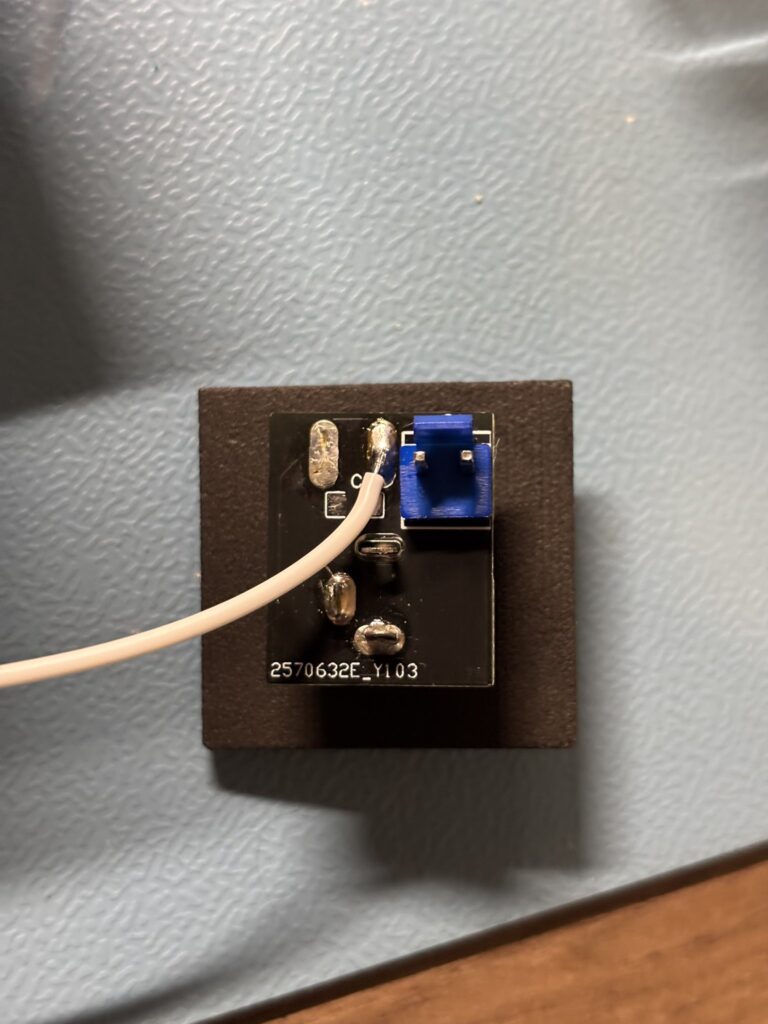
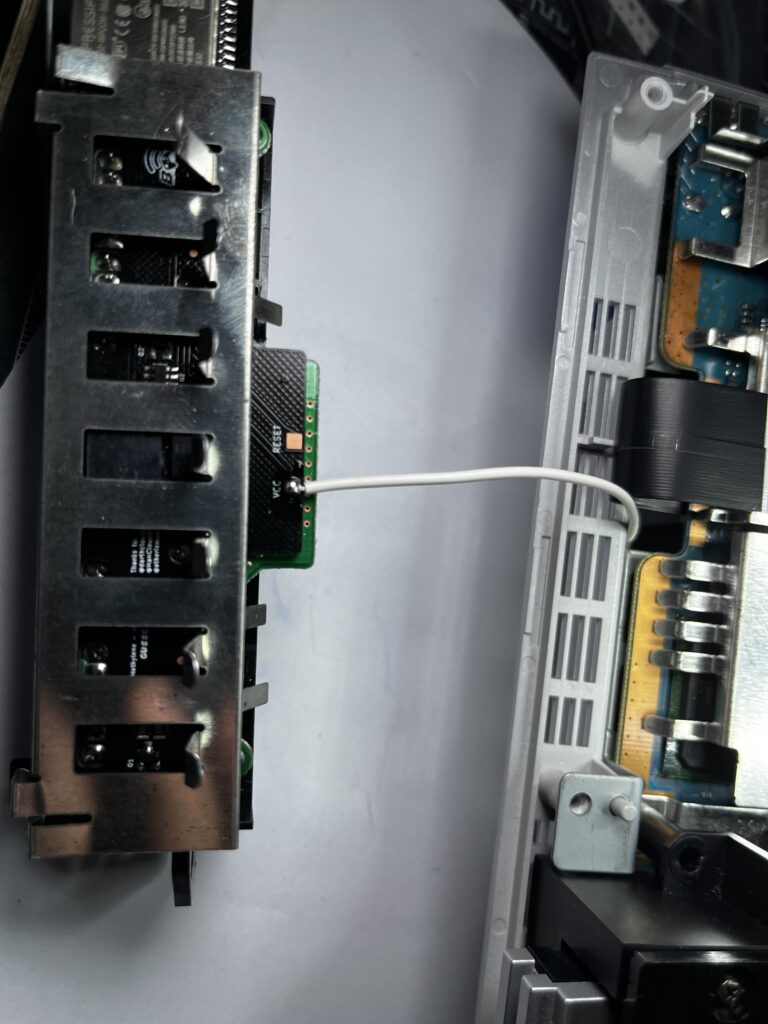
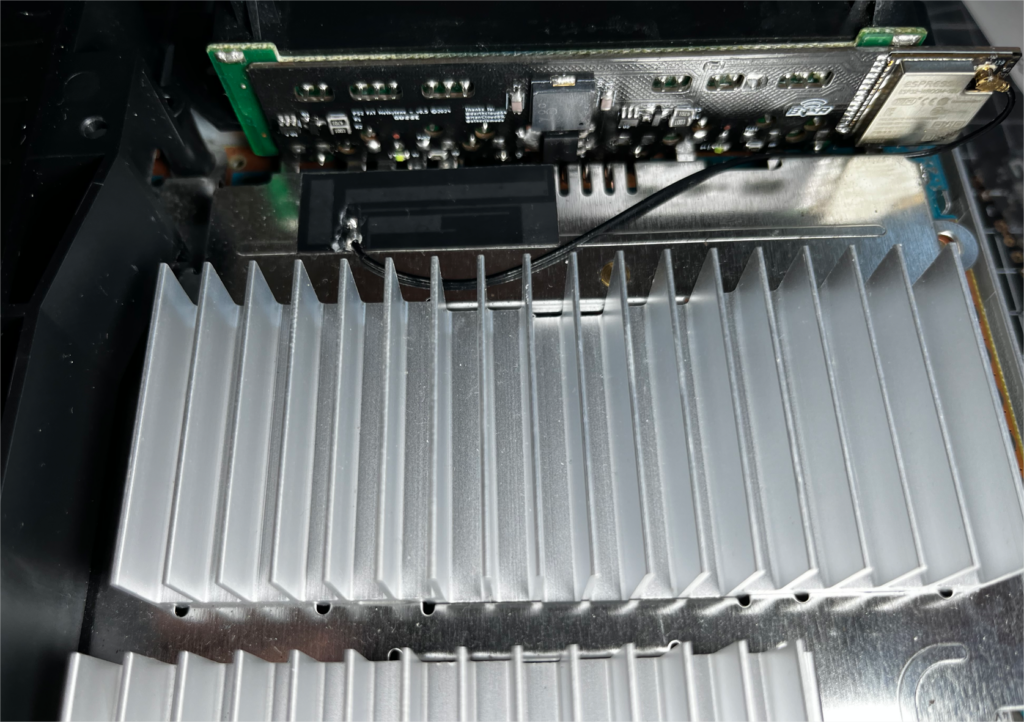
5. Solder the reset point
To avoid disassembling the console completely to solder the reset point. We’re going to solder the small control board containing the start button and LEDs. (Sorry for the sorry state of my board, it’s been through several tests).
Please see pictures on the side to avoid pinch wire when reassembling the console.
You can also use reset point that you can find on modchip diagrams, but this requires the console to be completely dismantled.
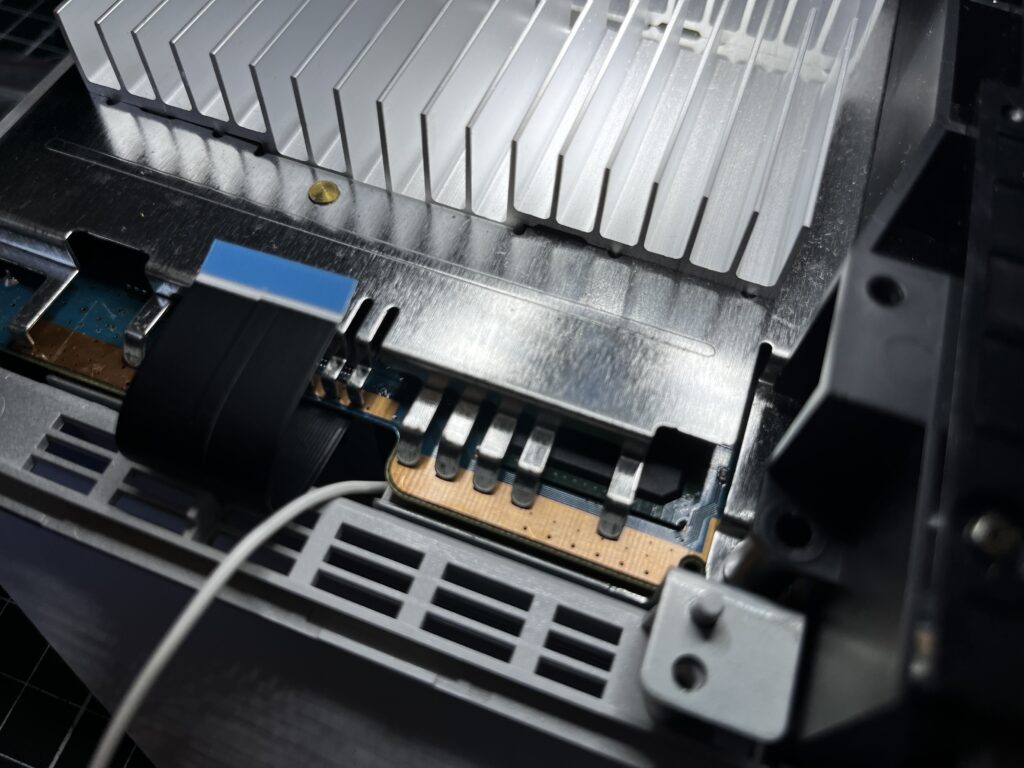
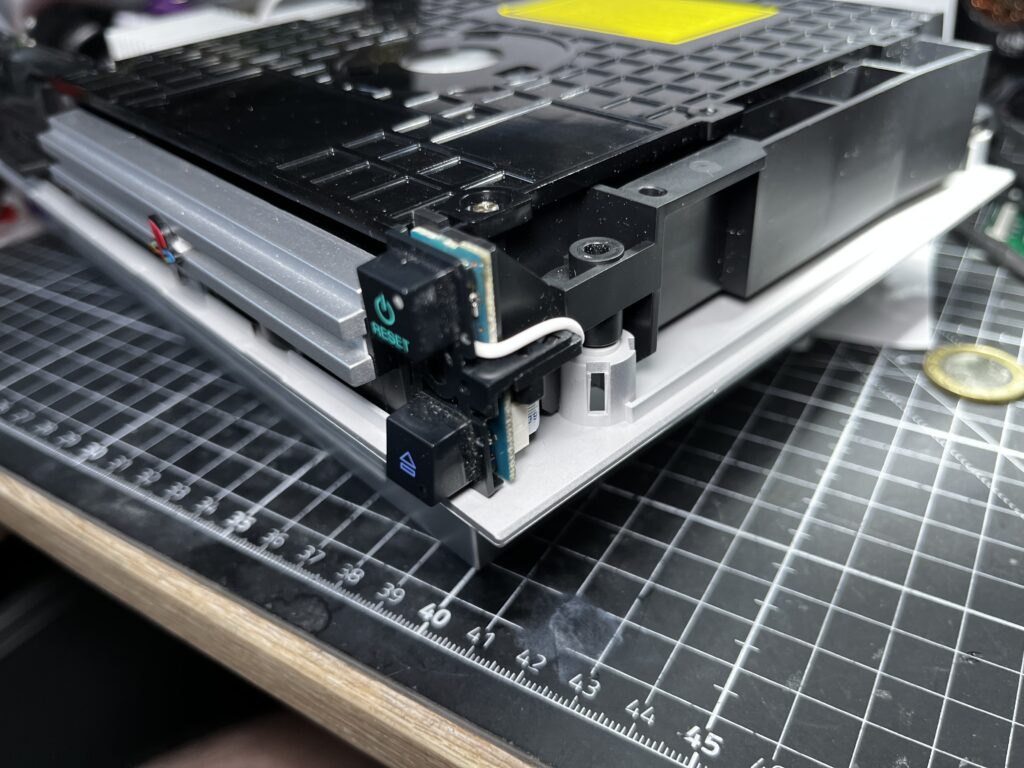
6. Reassembly
If your Methylene board lies flat, you should have no problem sliding it back into place.
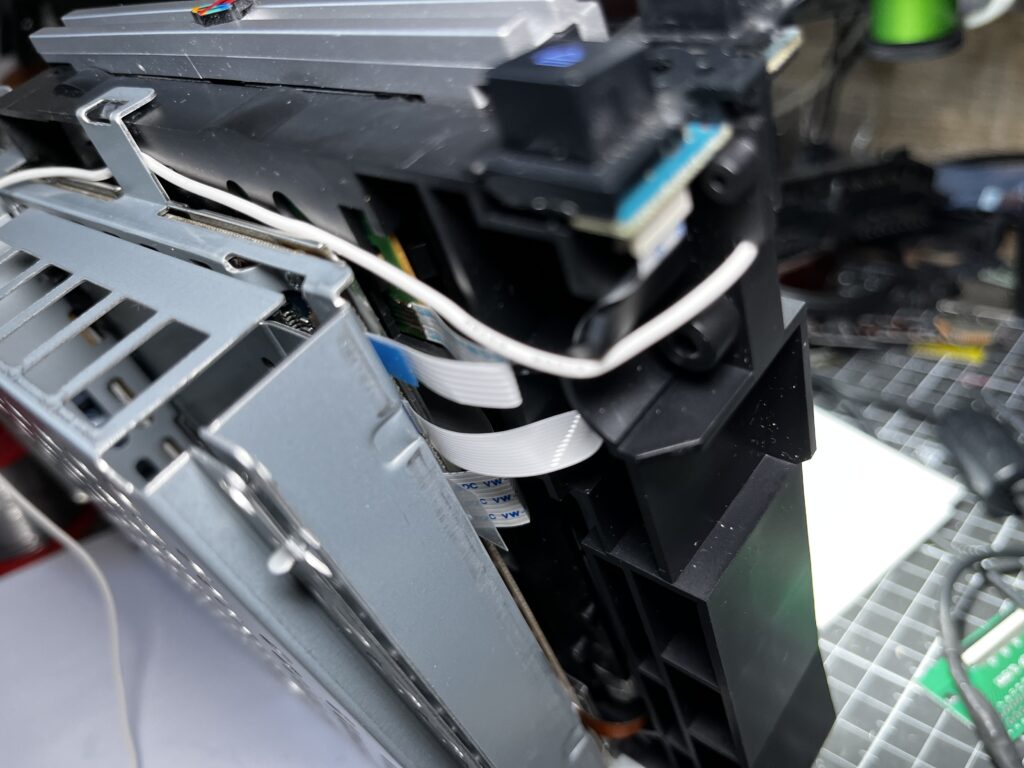
If not, don’t worry, just lift the motherboard slightly out of the bottom shell, place the VCC and Reset points on the underside of the motherboard, and put it back in place.
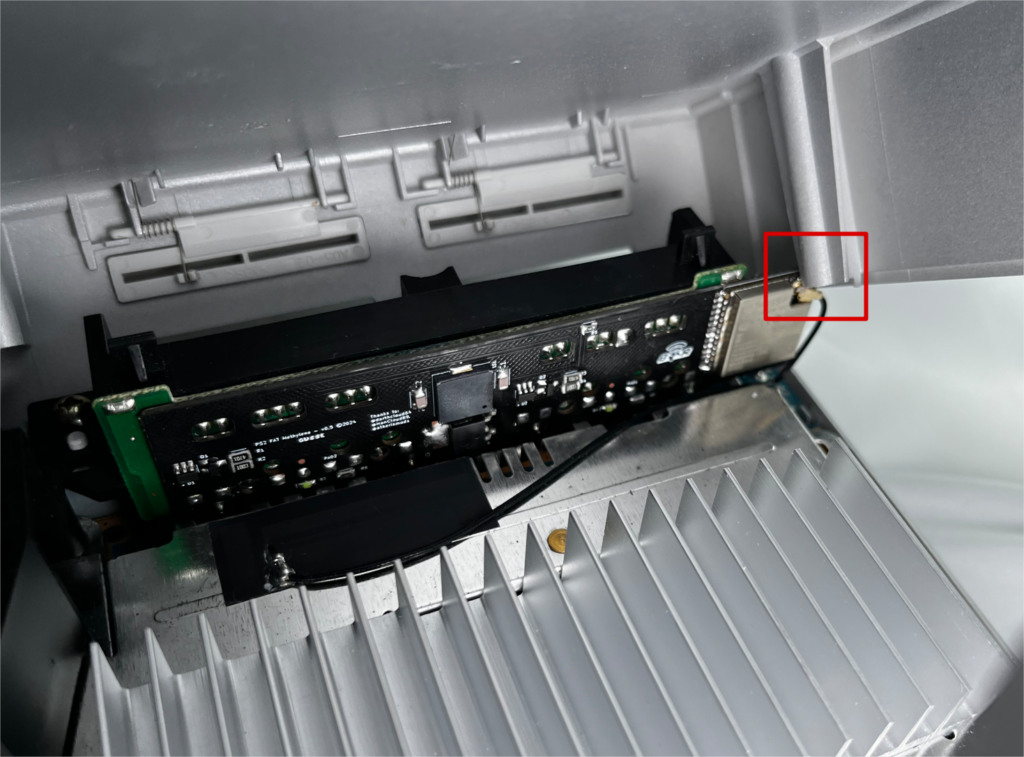
When reassembling the console, be careful with the part shown in the photo on the side, so that it doesn’t disconnect the antenna from the board.
7. Start-up and apparaige
Now that installation is complete, you can connect your console to the power supply. LED 1 should flash when connected.
Start your console by pressing the power button on the console. The ESP32 is now waiting to be paired with a joystick; the LED on Methylene flashes slowly.
Perform the pairing operation specific to your controller, e.g. on Dualshock 4, hold down SHARE+HOME until the LED on your controller flashes rapidly until it turns to a fixed color to indicate the success of the operation, and the LED on Methylene will also be fixed.
To pair a second controller, switch off your console and carry out the same procedure with another controller.
To pair DS3 controller you can follow this guide on awesome blueretro documentation.
8. Wired controller detection
To test this functionality, I recommend using a Bluetooth controller with an indicator light.
For example, a Switch Pro controller or a Dualshock 4.
Pair up your controller and boot up the console.
Then connect a wired controller to port 1, and the position of your Bluetooth should change. For example, your Dualshock 4 will turn red, or a Switch Pro controller will switch to position 2.