It’s a simple guide of the usage of the PS2 SLiM SD mod, for basic operations.
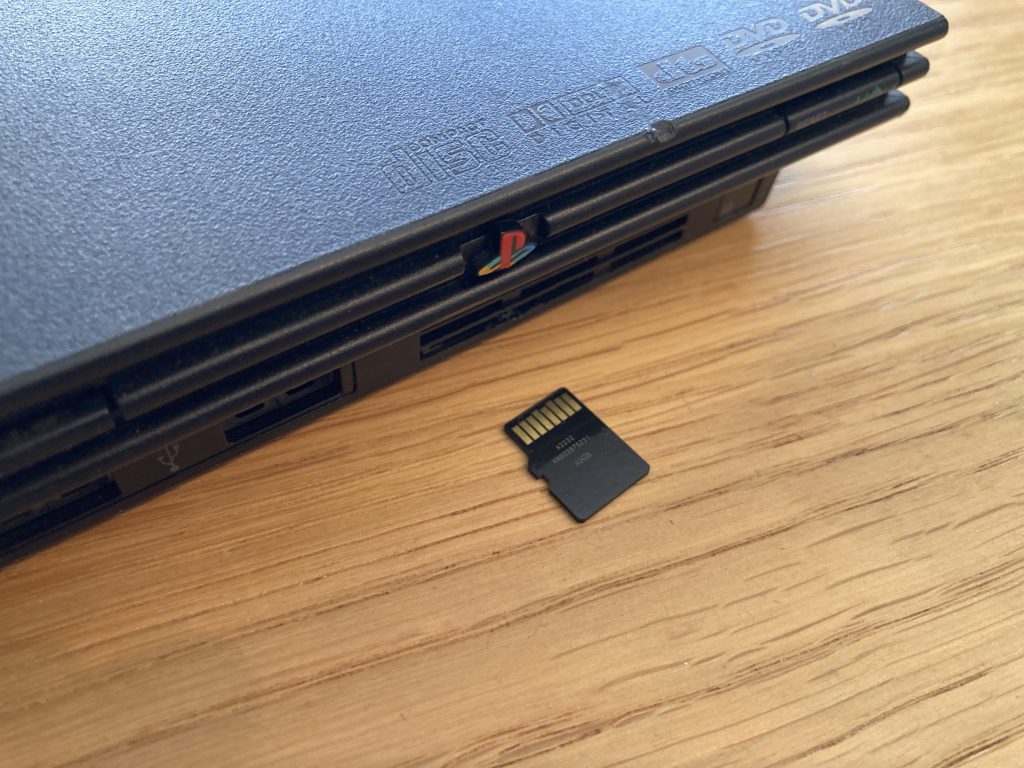
Insert the SD Card in PS2
The SD card must be inserted FACE DOWN, connector up as you see on the picture.
It should not force, if it forces, it is that something does not go, look at the sale of connection it must be perfectly clear and accessible.
WARNING: NEVER insert or remove the SD card when the console is power ON.

Boot the console
To boot on the SD card you have to hold L1 button during the boot sequence when Matrix logo appear.
The activity LED of the SD card mod blink once when it’s OK, you can release the L1 button, then OPL boot and show up the game list.
To play a game select and press X to launch it.
Auto-boot
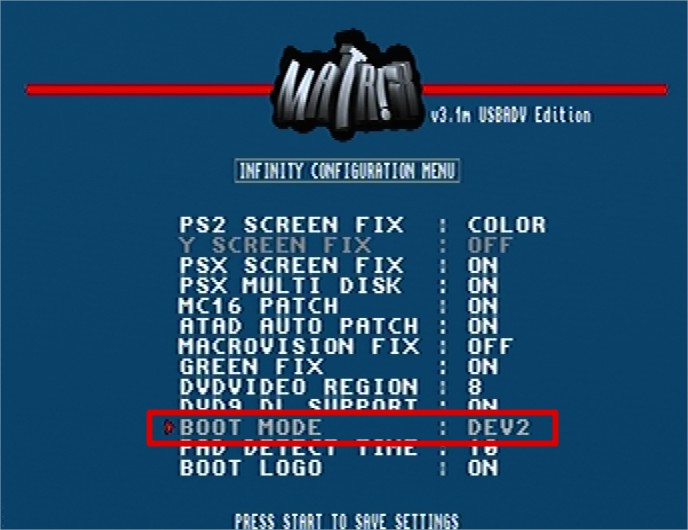
If you want boot directly on SD card on console start without holding the L1 button. You can configure that in modchip menu, by hold circle + triangle during boot(when Matrix logo appear on screen) and set DEV2 in “boot mode” section, then press “start” to save setting and reset.
The console will boot on the SD card.
But when it’s configure like that, you can’t direct boot on a disc game or you need to hold CROSS during boot.
Add Game to SD Card
To add more game on SD card, you have to plug the SD card on computer.
WARNING: DO NOT FORMAT, it’s a raw format not recognised by your computer
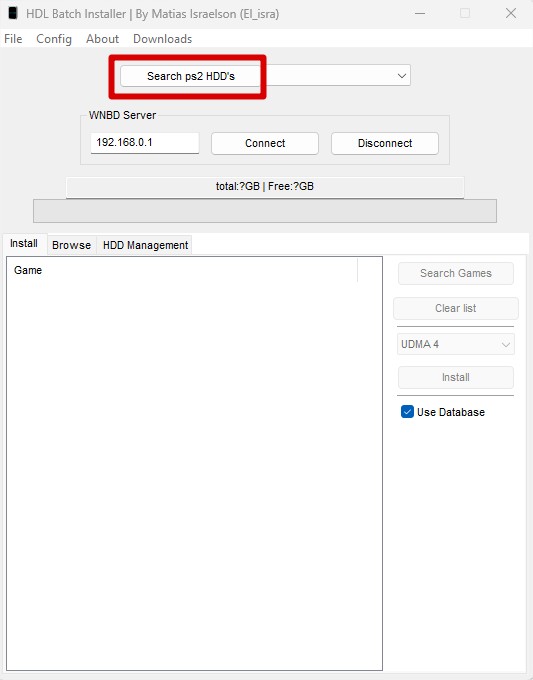
Use an app which is HDL Batch installer you can find latest revision here:
https://github.com/israpps/HDL-Batch-installer/releases
Click on “Search ps2 HDD’s“, then it’s find, click on “Search Games“.
Select your iso you want to add to your SD Card, click “Open“.
You got a confirmation message, and you have to click on “install” and wait the end of the process (check the console command in back to get progress).
Remove game
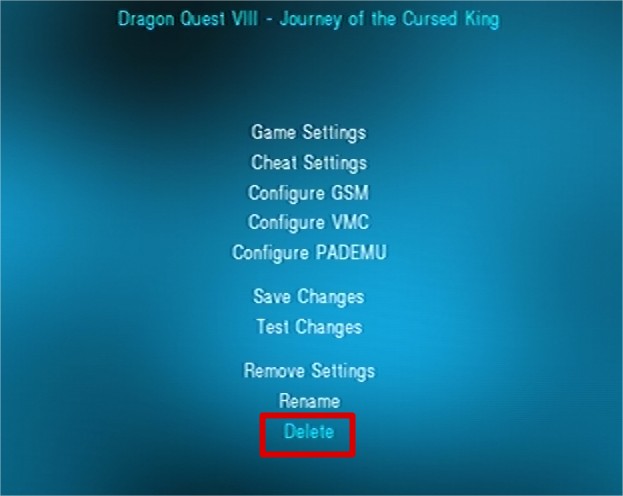
To remove a game from SD card you have to do this via the console by option menu in the OPL application (you need to set “write operations” to ON in OPL in settings menu).
Select the game you want to remove, press TRIANGLE, and select “delete” in the menu and confirm.
