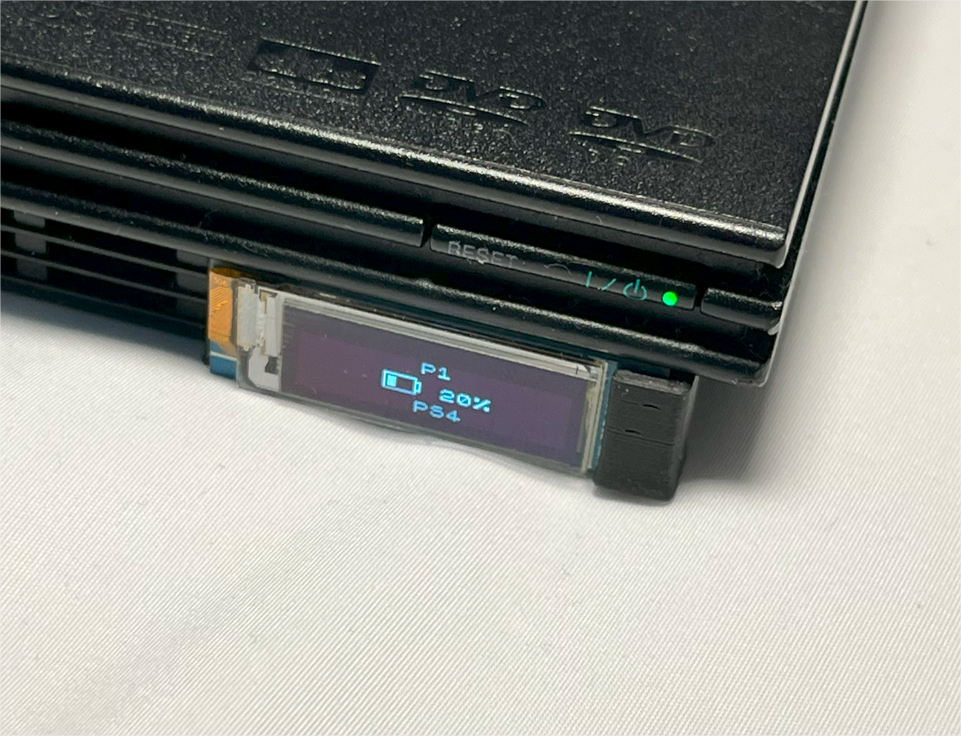
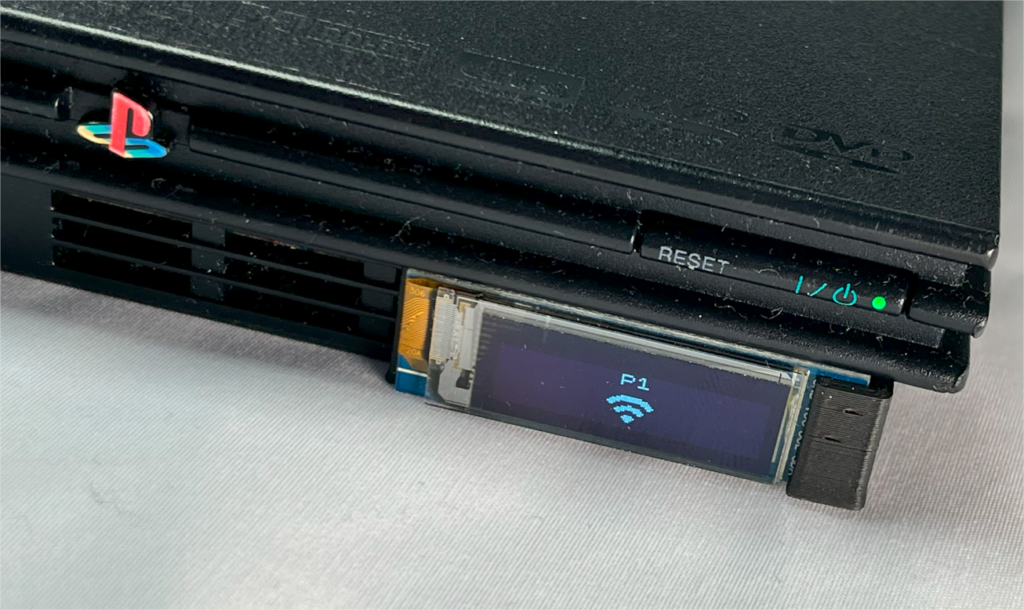
This guide will enable you to add a small OLED status screen to your PS2 Slim with Methylene. This will enable you to view the battery level of your wireless controllers (currently only DS4, the others will come later), and it will also show which type of controller is connected, if it’s a wired controller.
This guide explains the process for Methylene for SLim, but if you’d like to install it on Methylene Fat on your own, the firmware is of course compatible with it.
Here are the parts to be 3D printed for the OLED support:
Methylene OLED 3D support
Any support request will simply be ignored, thank you for your understanding.
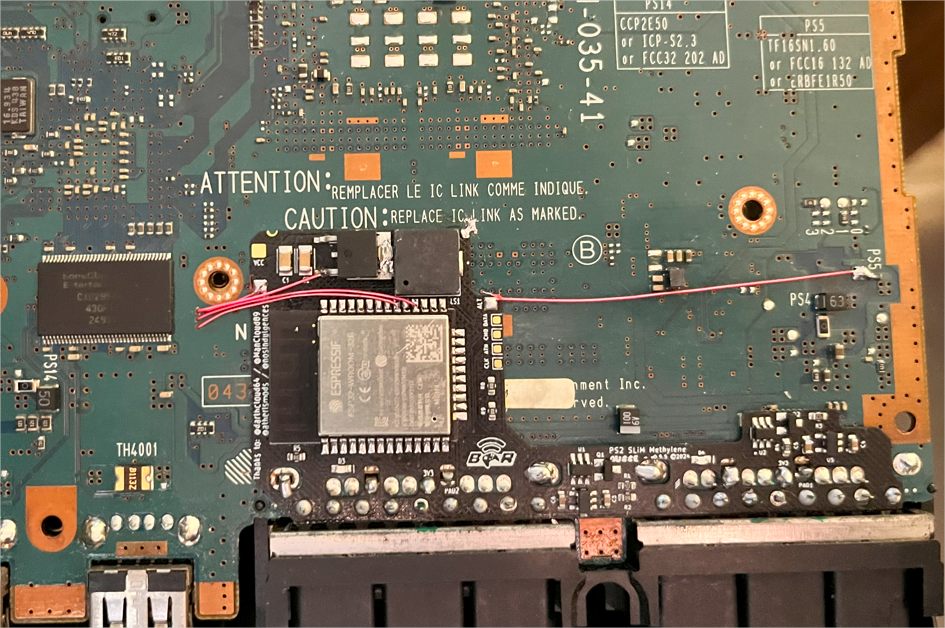
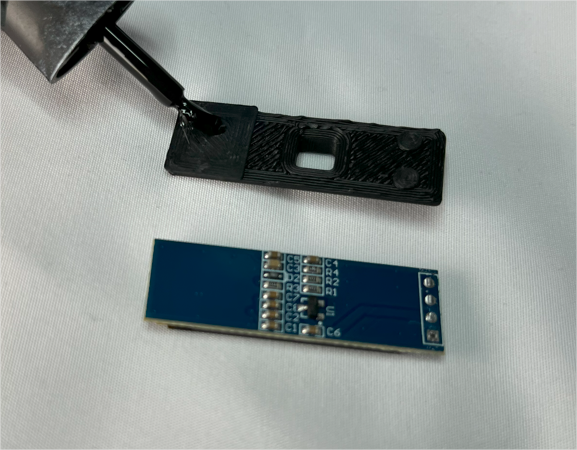
Solder 4 wires on Methylene as mentionned
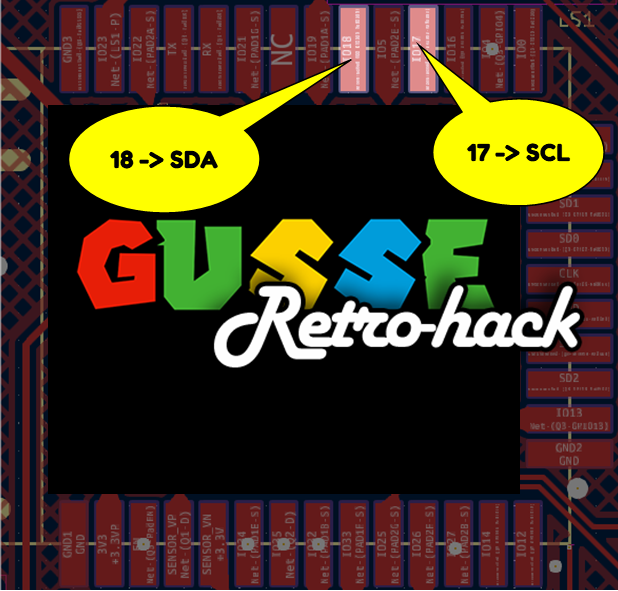
solder the following wires on the ESP32 PADs to the OLED display on the corresponding PADs.
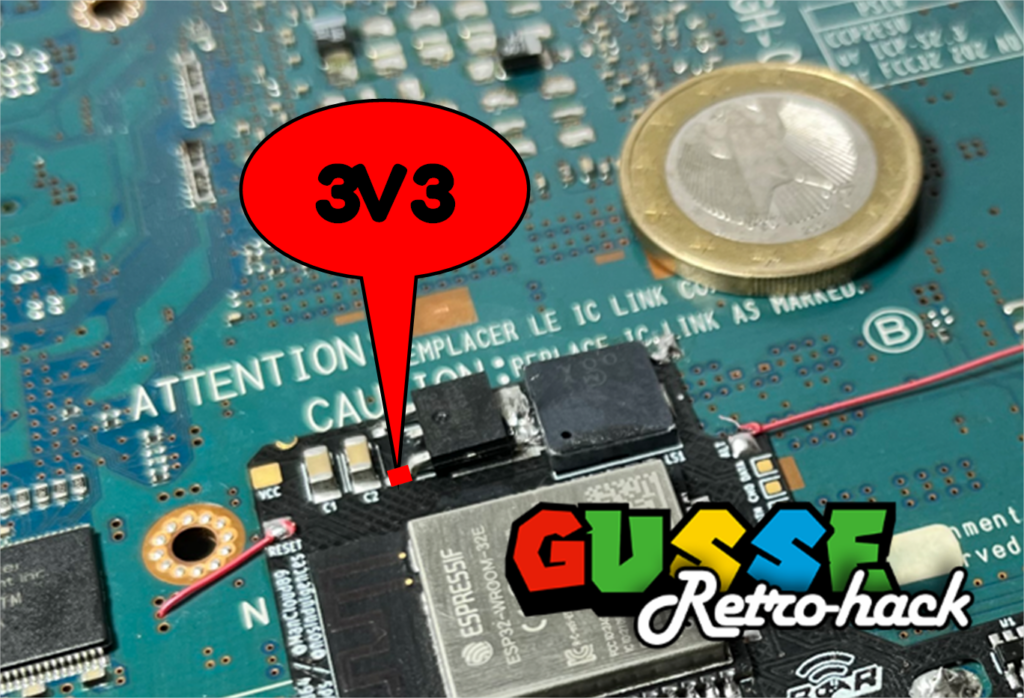
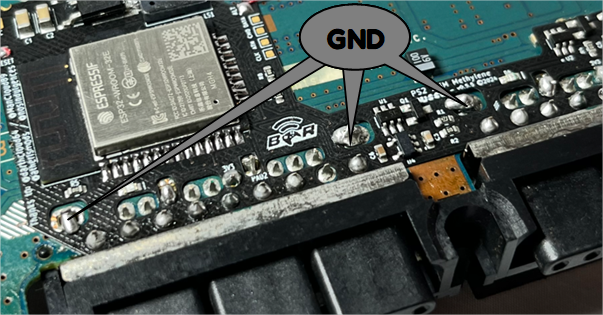
3v3 and GND
Solder a wire to the 3v3 voltage regulator as shown in the following photo.
For the GND, use the one you want on the motherboard or Methylene.
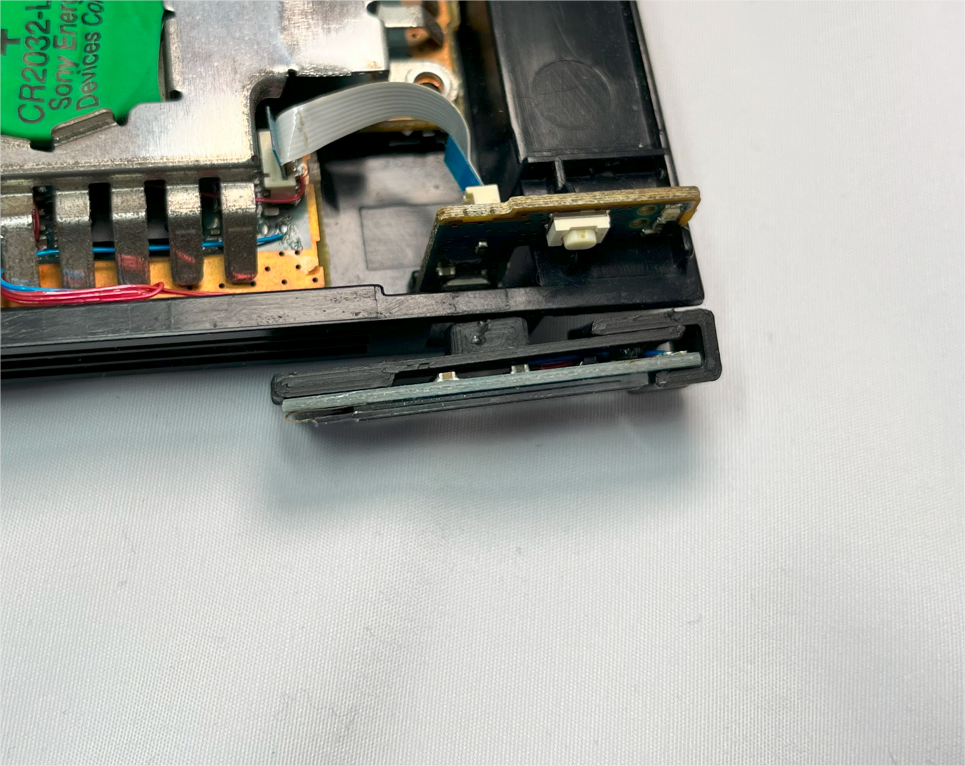
Overview of cable management installation through the motherboard for optimized cabling.
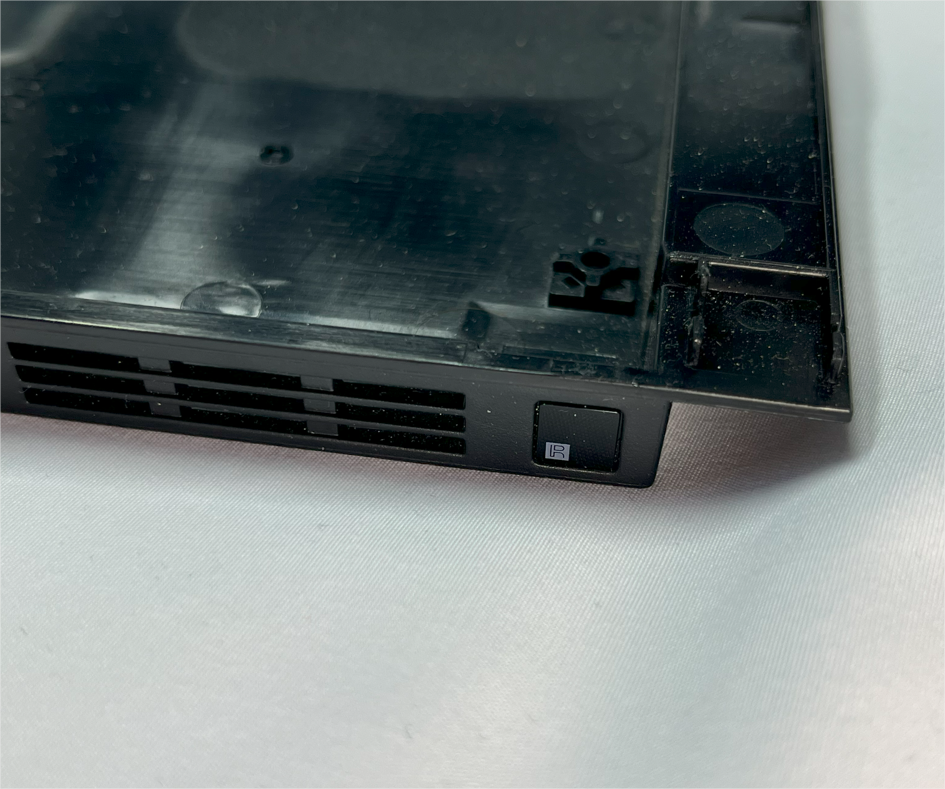
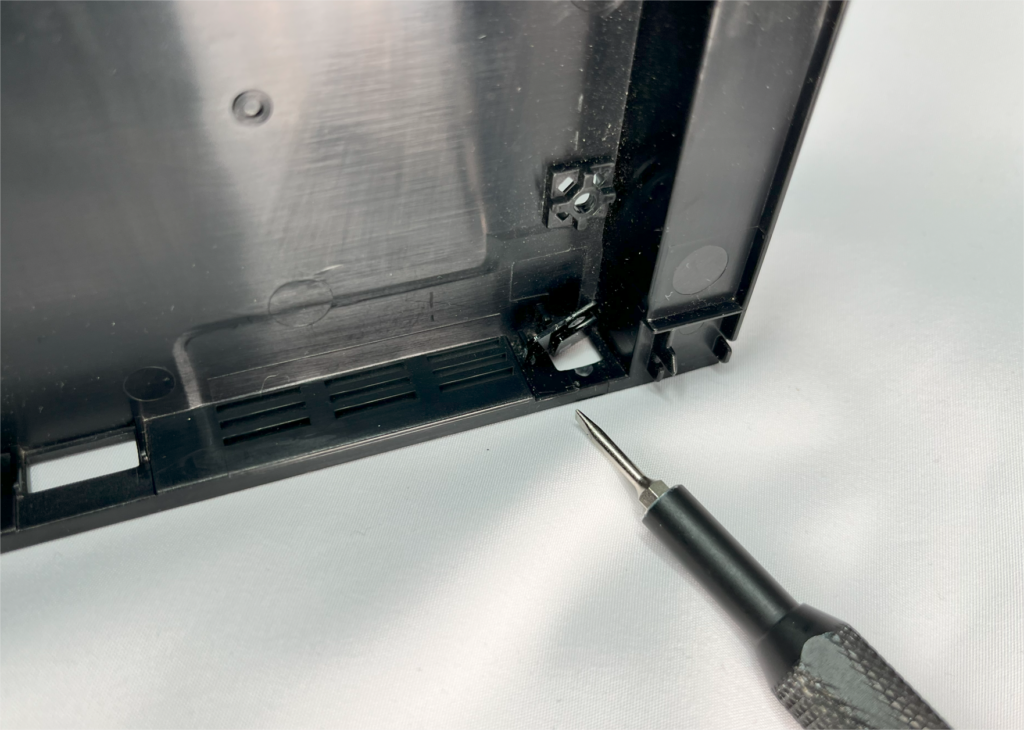
Shell preparation
Prepare the lower part by removing the IR port cover with a screwdriver to allow the 4 wires previously soldered to pass through.
Then pass the 4 wires soldered to Methylene through this hole, and through the 3D printed part.
Then solder the 4 GND VCC SCL SDA wires to the OLED screen, soldering as flat as possible.
If your screen has connecting pins, unsolder them or cut them off. Your screen must lie flat on your 3D support.

use glue to stick the screen to the 3D support once everything is soldered, and place the whole assembly in the IR port, it should fit. If you feel it’s not holding together well enough, add a small dot of glue to the inside of the hole to hold it in place.
slide on the second part as shown here to hide the solders
Update Blueretro with specific version
Use ONLY this specific version of Blueretro for Methylene to flash it and get an overview of your Methylene status, use standard version if you don’t use OLED screen.
Please note that at present only the battery level is available for the dualshock 4, with batteries for other controllers to follow.
The modified version of Blueretro v24.12 OLED for Methylene
Blueretro HW2 – Methylene edition – OLED
Changelog :
24.12 – OLED
– OLED Status screen support (battery level for DS4)
– Beep on controller connection
24.11
– wired controller detection logic reviewed, controller detection only occurs when console is ON
24.09 (based on 24.04 official release)
– Dualshock 3 bugfix in specific case
– Rumble enabled by default on flash
You can update via bluetooth OTA or by flashing your ESP32 via a progammator if you have.